In our continuing series on food photography, Tessa Huff of Style Sweet CA will be showing us how she styles and photographs the wide array of baked goods and desserts she creates by breaking down her photos for us. There will be lots of tips and tricks to help guide you with your own food photography, as well as a healthy dose of inspiration. Today she walks us through creating top down food photos that are perfect for spring pies, tarts and tortes.

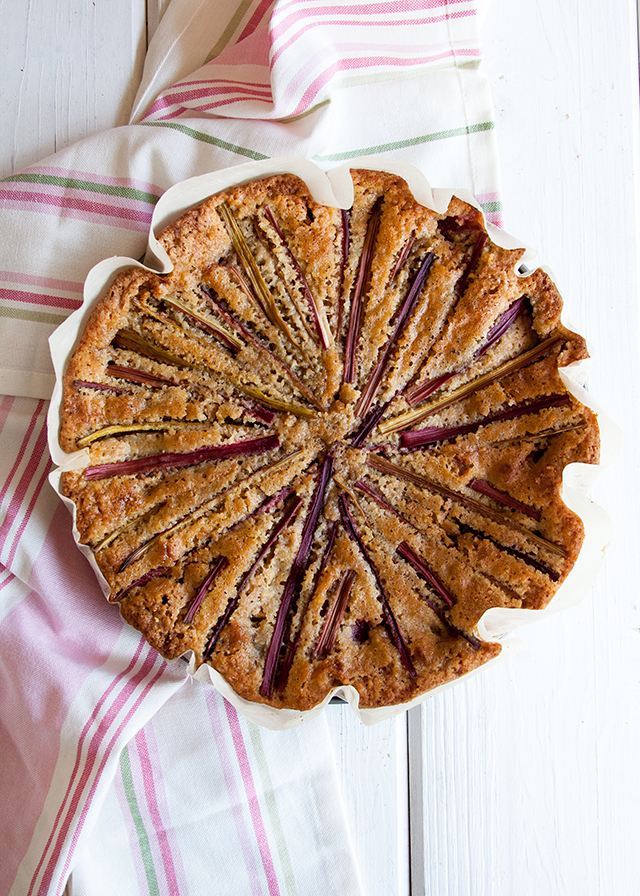
For someone like me, whose holidays always revolve around treats, Mother’s Day is all about brunch or high tea fully-stocked with individual pastries, freshly whipped cream or butter, and tarts and cakes to be shared. This year, I decided to bake a Strawberry Rhubarb Almond Torte. I created a star-burst pattern with the rhubarb on the top of the torte and thought it would be a great subject to be photographed from above. It provides the perfect opportunity to talk about top-down shots and overhead food styling and photography.

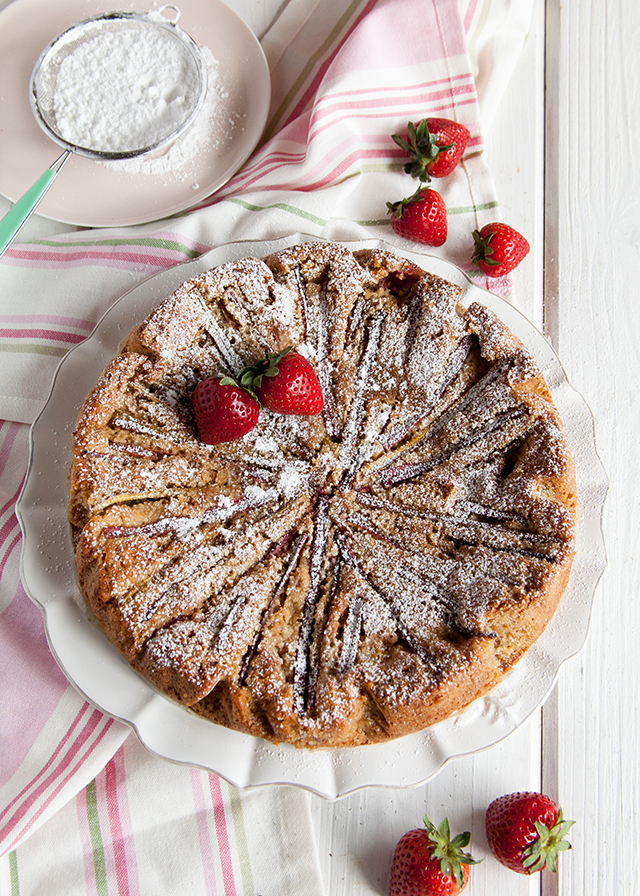
Unlike a layer cake that’s typically shot straight-on in order to show off its height, a single layer cake, tart, or pie typically appears the most attractive when shot from above. Since top-down shots limit the amount of depth produced in an image, it works for these shorter, flatter subjects.

Getting a true overhead photo might be difficult at first, but with just a bit of practice and getting to know what the camera feels like when directly above your subject it does become quite unfussy and straightforward. You may also just use a tripod with a horizontal arm and make your life much easier. Mastering a great overhead shot may be less complicated than other orientations since you don’t need to worry about different angles or where the horizon cuts into the background. However, I do believe that means these types of photographs rely more on styling and lighting to help tell the story, especially since shooting top-down tends to flatten out an image.
For this particular study in overhead photography, I wanted to capture the detail on the top of my torte and style the photo with the tone of a casual, sunny Mother’s Day late morning or afternoon.
Propping and Styling Overhead Shots:
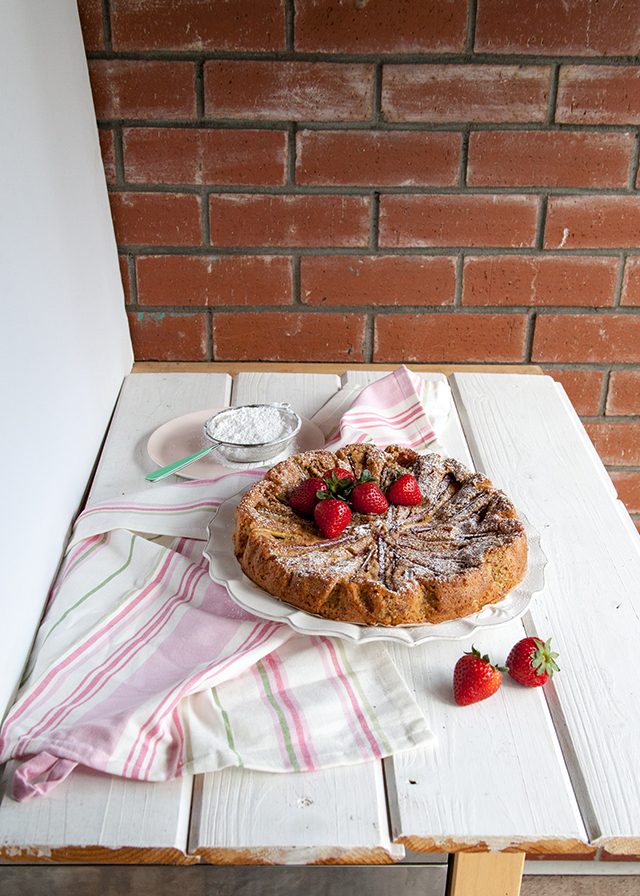
The torte is fairly rustic so I pulled surfaces, fabrics, and props that reflected a more country-chic look. In keeping with the Mother’s Day theme, I kept to whites, pinks, and light neutrals. The planks of the tabletop not only helped guide the eye in the overhead shots but gave a casual tone to the overall setting. I utilized a simple striped tea towel to add movement and texture to the background and left on the ruffled parchment around the torte for some of the shots to give a fresh-from-the-oven, rustic feel. The plates and flatware were clean and simple.

I stuck to food-related props to enhance the scene. The small sifter with confectioner’s sugar in the first couple of photos foreshadows the dusting of sugar to come. The strawberries not only add a big pop of colour but give a nod to the strawberries inside the torte that we can’t see from the outside.

I wanted to capture the whole subject and not just a piece of the torte, so I chose a moderate depth of field, keeping my aperture around f/8.
Lighting a Top Down Photo:
As discussed in my introductory post, I solely use natural lighting for food photography. I shot these photos in the late morning while the sun was shining through thin clouds. I decided to set up outside on my covered patio, making sure to get an abundance of indirect light. Since I wasn’t going to use a tripod, I needed to make sure I had enough light to shoot hand-held -- meaning a quick shutter speed to eliminate camera shake. I was able to bump up the ISO a bit since the photos were only going to appear online (I keep my ISO at 400 or lower for anything that might go to print).
Being outside but under an overhang, I had light coming from a few different directions with the main source from the right side of my subject. As mentioned, I was aiming for a sunny, spring tone. To me, sunny means a bit of contrast with at least some shadows. I wanted to keep the shadows light and airy without eliminating them and was able to take most of the photos without a reflector or bouncing the light. As my light shifted, I did end up adding a plain white piece of foamcore to the left to bounce what available light I had back onto the subject. This action smoothed out some of the shadowing, but still left me with an evenly-lit photo.


Tips and Tricks for Overhead Food Photos:
Having a hard time getting a true overhead shot? Get a step-stool (which I used) to get nice and high above your subject or set up your scene on the ground and stand above it. Use the edges of your surface or tabletop to help guide you.
Overhead shots are great for capturing an entire dining scene. Get high above the table and snap a couple of pictures of your table setup for a feast or of guests enjoying a meal or treat.
Overhead shots help minimize height issues. If you’re trying to capture a tabletop where the elements are all different heights, trying shooting from above to minimize height discrepancies between subjects.
Looking For More?
- Food Photography: Start With the Basics
- Protecting Your Photograph's Copyright
- Five Ways to Improve Your Photo's White Balance
- iPhonography - Some Advice
- Food Photography and Styling Books For Bloggers
Food Photography: Start With the Basics was writing byTessa Huff. Tess is a Vancouver-based pastry artist, food stylist, and photographer. Before moving to British Columbia, she was a cake decorator for several years and owned her own cake boutique. Huff currently runs her blog, Style Sweet CA, and is a freelance recipe developer and photographer. She just completed writing and photographing her first cookbook (Abrams Books, Spring 2016) and is having fun spending time with her husband and their new baby boy.
Follow Tessa on Social Media


Hi Tessa
a very useful post.
Now if only you could have included a photo taken by someone else of you taking the shot…
Thanks
Alex
Really great tutorial Tessa. I have given in and bought a light for my photography. There are too many dark days here in Ottawa! It was a great investment and has made my life much easier!
http://www.bhphotovideo.com/c/product/904852-REG/impact_frc_22_ready_cool_22_fluorescent.html
I am struggling with photography in my blog and your posts are easy to understand and helpful to me, Thank you!
Thats so great to hear! It’s definitely a skill that takes a lot of practice but we’re glad we could be of help 🙂