In our continuing series on food photography, Tessa Huff of Style Sweet CA will be showing us how she styles and photographs the wide array of baked goods and desserts she creates by breaking down her photos for us. There will be lots of tips and tricks to help guide you with your own food photography, as well as a healthy dose of inspiration. Today, as we move into fall and winter, Tessa gives us a tutorial on taking dark and moody images!

As the days get increasingly shorter and gloomier this time of year, the weather and available natural light (or lack there of) encourages and inspires dark, moody photos as well. While some situations call for light, bright images, it is quite easy to embrace the dappled, naturally diffused light and let our photos reflect the rainy days that are bound to come. Instead of trying to force bright and airy images (although I will be covering how to shoot in low-light situations soon), let us learn to create intentional shadows, manipulate the light that we do have, and style more moody, dramatic food photos.
An Experiment Between Light and Dark:

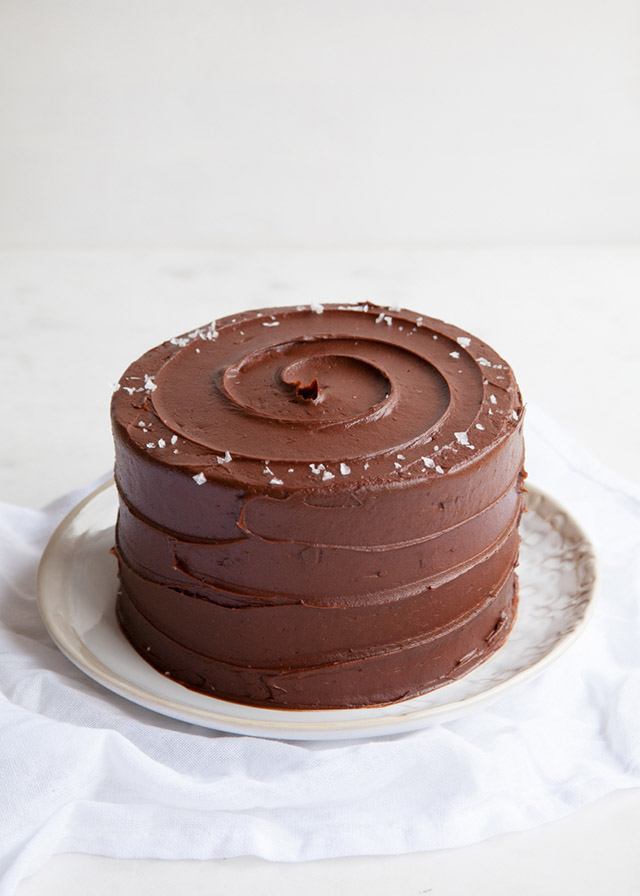
In contrast with today’s topic, let’s first take a look at a bright, light set-up. The day that I shot these photos was cloudy and I had minimal light to work with. For days like these, I tend to shoot outside on a covered patio. Naturally, I picked a white backdrop and linens to pull as much light as I could for this image. I also used a white foam board opposite my main light source to bounce the light back onto my subject. In the end, I still was able to achieve a fairly bright image.
But what if you don’t have an outdoor space on a cloudy? Or what if you want more dramatic, intentionally shadowy images? Well, we can work with that too!
Side Light

For more dramatic images, I typically rely on side lighting. Where as when I shoot outside I have multi-directional light, setting up indoors next to a large window gives me a stronger, more concentrated light.
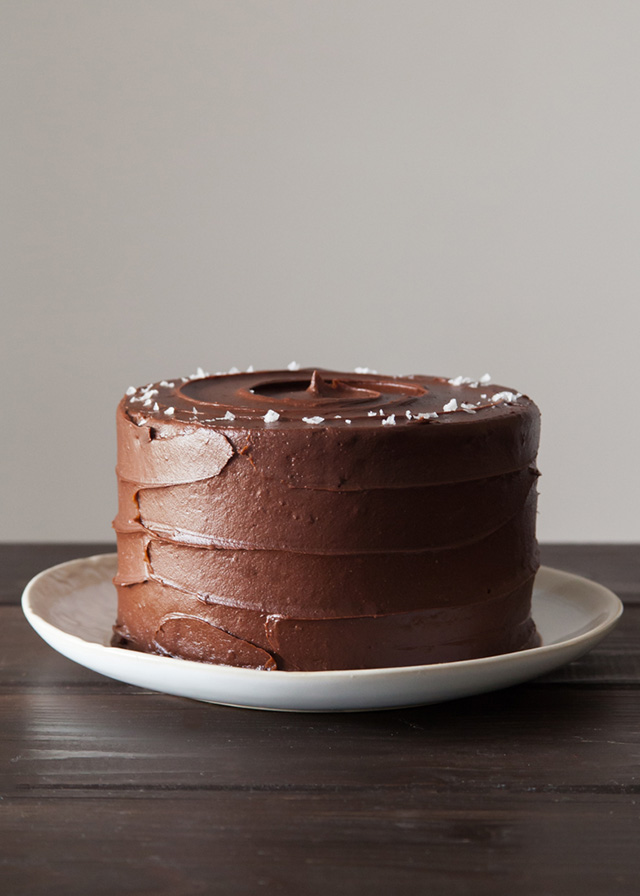
As you can tell from this first image, shooting my subject straight on with lighting coming from the left creates natural shadows on the right. This cake was photographed with neither white nor black boards to bounce light, diffusers, or reflectors. I also changed to a darker tabletop and used the shadowy wall inside as my backdrop. Just making the simple move from outside to indoors already makes a big difference.
Enhancing Shadows
Depending on how dark and moody you want your final image to be, you can enhance the natural shadows that a side-lit photo provides a few different ways. The trick? Black foam boards!

Bounced with a Black Board:
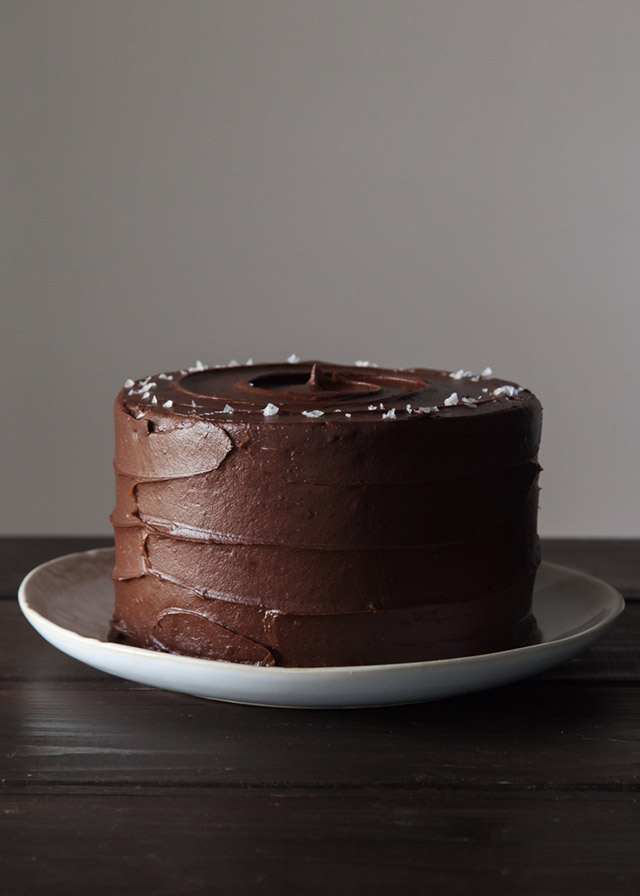
In this second image, I took our control cake (side-light with no diffusers or reflectors) and simply added a black foam board to the right of it (opposite my window). The black board enhances the shadows on the right side of the cake.

Top Coverage:
In this third image, I kept the black board on the right side and added a second hovering over top of the cake. As I start to block out light and elongate the shadows, the photo becomes increasingly moody with more contrast (see image for example).


Blocked Light:
In this fourth image, I used a third black board to block some of the light coming in from the left side (the other two, on top and to the right, stayed the same). I angled my last board to fit in between the window and the lens of my camera to block out some of the light on the front of my subject. As expected, the end result was the most dramatic of the four.
Styling:
To go along with more moody, dramatic lighting, I favor more rustic and unrefined styling to help tell stories with my photos.

Backgrounds
Texture:
For bright, light photos, I tend to favor crisp, clean props and styling. A more minimalist approach. For more melancholy or contemplative images, I like to use texture and add movement. One of my favorite backgrounds for dark and moody photos? An old (yet clean) baking sheet!
Color:
While you can certainly pull off dreary with light backgrounds, if you use darker props you are already halfway there (without hardly trying). If you are just starting out and want to get more of a gloomy or cloudy afternoon vibe, try using darker backdrops. However, you will still want your subject to “pop” a bit, so keep your focus in mind when choosing monochromatic props
Directing Light:
Similar to what I did earlier to enhance and elongate shadows using black bounce boards, I used the same foam core to direct the light. If working with multi-directional light (like this second batch of stylized photos), use black foam core to block out and/or direct the light. To do so, funnel the light to where you want it to appear in your photo.

In this set of photos, the sliced cake was the main focus and I wanted to bring more light to the subject. I used a craft knife to score one of my foam boards down the center (but not all the way through) to be able to fold the board in half and prop it up near my set-up. I angled the folded board so it blocked some of the light near the top of my frame and helped funnel it towards the subject. Again, I used the other boards opposite the main source of light for more shadows (see photo for example).

Composition:
A pretty simple styling tip worth noting is to angle the cut side of the slice of cake towards the light source. This might be fairly obvious, but it does make a difference. However, if you’d like to play with even more shadows, try the opposite!
Looking for More?
- Food Photography: Taking Top Down Food Photos
- Food Photography: Start With The Basics
- 9 Must Read Food Photography Articles
- Food Photography and Styling Books for Bloggers
Food Photography: Outdoor Photography was written by Tessa Huff. Tess is a Vancouver-based pastry artist, food stylist, and photographer. Before moving to British Columbia, she was a cake decorator for several years and owned her own cake boutique. Huff currently runs her blog, Style Sweet CA, and is a freelance recipe developer and photographer. She just completed writing and photographing her first cookbook (Abrams Books, Spring 2016) and is having fun spending time with her husband and their new baby boy.


I totally need this post!!! Bookmarked 🙂
This was super helpful Tessa! I haven’t used the black foam boards for anything but backgrounds. With the Fall weather in full swing, I might try to embrace the moodiness and try some darker shots. Waiting around for sunny days could be a challenge :).
I love the moodiness in these pictures. And that cake … gorgeous!
This was straightforward and helpful. The shot of the tripod and work set-up was particularly helpful. Thank you!
Awesome! So glad you found it useful Shauna!